 Recording a lecture is a quick way to get content up on the internet. You can spend a lot of money and record the lecture with 3 to 5 cameras or with a little planning you can make it look like you had multiple cameras and record the entire lecture with one camera. I have worked for over thirty years in educational video production and have recorded hundreds of lectures. Here is how I would do it.
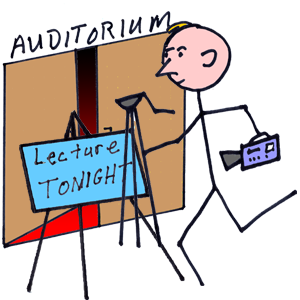
1. First, get there early and set up. You’ll never do a good job if you are rushing around at the last minute.
2. Use a tripod and save yourself a lot of pain and your video audience a nauseating experience. Get a tripod that is strong enough to hold your camera with a smooth, easy to use camera head. A camera that is properly balanced on the camera head and tripod should be level and point straight ahead WITH OUT being locked down. This way when you fall asleep during the lecture the camera doesn’t tilt and end up pointing at the ceiling.
3. Set up close enough to the speaker to get an MCU shot. MCU means Medium Close Up and this would include the upper body and the head of the speaker. These means DO NOT set up in the last row of the auditorium. If you do you will need a really long and expensive zoom lens to get the MCU shot. Camera’s that are zoomed in all the way have a tendency to look very shaky.
4. Set up the camera so that it is at eye level with the speaker. If you set up in the back you will be above the speaker looking down on them. You will get a great shot of the top of their head. If you are too close, like right below the stage you will be looking UP at the speaker getting an unflattering “NOSE” shot. What you want is to be eye level. In a slopping lecture hall this is usually 5 to 10 rows back. If you are in a flat auditorium set your camera and tripod on a riser about 30 to 15 feet in front of the speaker. The idea is to get the camera at the speakers eye level and above the heads of the audience.
5. When you are picking your spot to set up the camera arrange the shooting angle so the speaker is not standing in front of a projection screen or an open window. This will cause the speaker to be silhouetted and that is not good at all.
 6. Be sure you have enough video tape or recording space on your disk to record the entire lecture.
7. Don’t record lengthy introductions unless the person doing the introduction is more famous then the speaker. Otherwise it is usually just too boring.
8. While the introduction is being done use this time to get cut-a-way shots of the audience. Just turn the camera around and record ten second lengths of people in the audience listening. Try to get a variety of groupings such as a wide shot, a medium shot with about 10 people in it, a smaller group and a few individual shots.
9. You may get lucky and be recording in a hall with decent lighting. Today’s generation of video cameras does a lot better in marginal lighting situations. But what do you do when they start the slide show and someone turns out all the lights?!?!! First, before the lecture even starts, ask. Make arrangements to have some light on the speaker if the other lights are turned out. If you have a spot light have it pointed at the lecturer. Make sure the spot light does not shine on the projection screen. Let the speaker know that you are recording and you would appreciate it if they stayed in the light.
10. Talk to the house AV technician about how they are handling the sound. You may be able to plug into the house AV system and record the lecture. Be sure you know if the house AV output is MIC or Line. Select the appropriate setting on your recorder. Depending on the House sound system can cause problems if the AV tech doesn’t know what they are doing. Oh, sure, you say you can count on them, but don’t bet the production on it. If you have a wireless microphone put that on the speaker. Record the house feed on one channel and the wireless microphone on the other channel. Never let the AV tech use your microphone for the House Sound. If anything goes wrong, including a direct hit from a meteor, they will blame you.
11. Once you start recording the lecture make no sudden camera moves. You should do some slow zoom ins and outs and you should follow the speaker if they move. If there is a bad jiggle or an unavoidable wobble you have the audience cut-a-ways to cover up any mistake during editing.
12. Don’t bother with the Q&A after the talk. These are usually more boring than the introduction, no one watches them on the video after the lecture and they will always make you go overtime. Use this time to get more cut-a-way shots.
13. Some simple cut-a-way shots that are easy to get will make it look like you had three or four more cameras in the lecture hall. If the camera has a battery unplug the AC and any other cables, like the house audio cable, pick up the camera and the tripod and sprint to the back of the lecture hall. Set up the camera and record a wide shot of the hall. If there is a slide up on the screen frame the shot so that you can’t tell what the slide is. Record steady shots with several framings that last at least 30 seconds. Now record a slow zoom out. Be careful you do not zoom in close enough to be able to see the speakers lips move. You don’t want it to look like you have sync problems when you edit.
14. Now run down the side isle and get a few more shots. Only do this on one side of the auditorium. You do not want to cross your line of action. We’ll talk more about that in another blog.
15. If the speaker is still answering questions you are golden. Go on stage and get a wide shot from behind the speaker looking out at the audience. Get several different framings that last at least 30 seconds each.
16. If the speaker used video or a slide show you will need that for the final program. The last thing you want to do is record the slides off of the projection screen during the lecture. Make arrangements before the lecture to get a copy of the slides or the video. Then you can edit the slides in during the edit. If the speaker will not let you have a copy then ask if you can spend 20 minutes with the slides after the lecture. Simply run the slide show and record the slides. Place the camera squarely in front of the projection screen and record at least 10 seconds of each slide. If you can point your camera at a flat computer screen you will get a better image. Bring a laptop to the lecture for this purpose.
17. Be sure the speaker has signed a release form.
Now you are ready to edit the program. We will go into this in more detail in the next blog. For more about recording a lecture with one camera you can download the free video: Recording the One Camera Lecture now.